
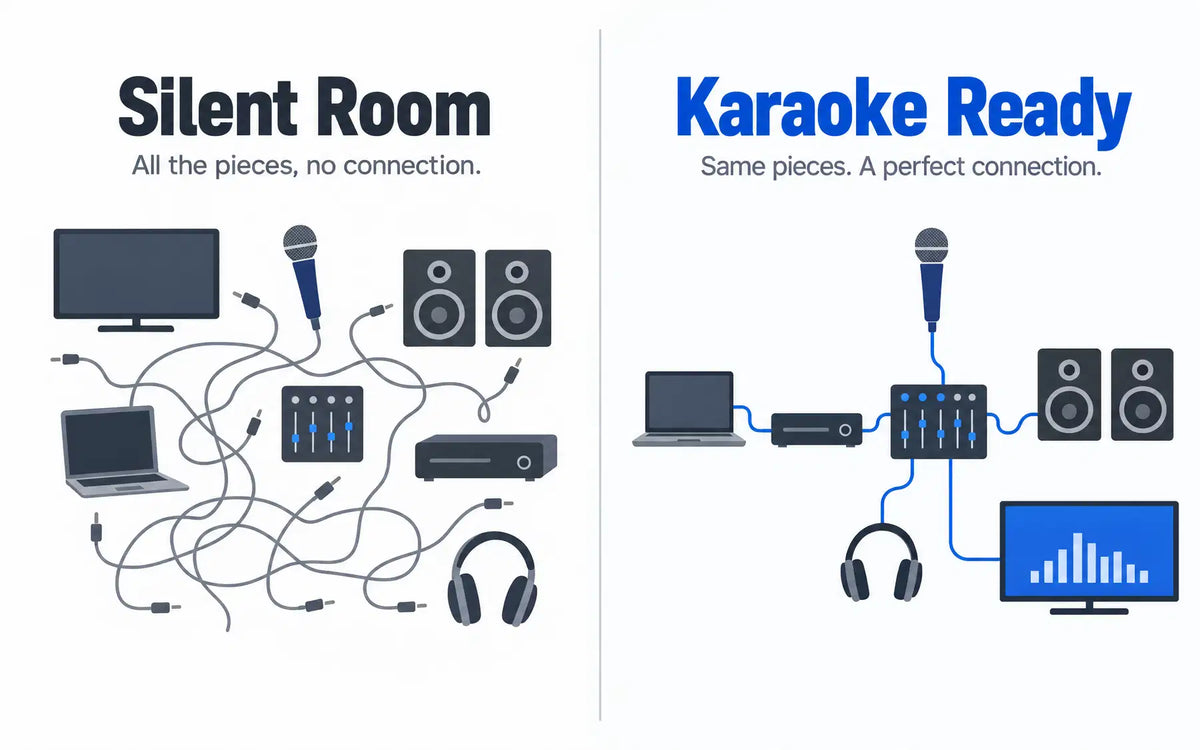
To learn how to set up a home karaoke system, you need five things in place: a sound source for the music and lyrics, a speaker, at least one microphone, a screen, and sometimes a mixer or amplifier to tie it together. Once you have those, a home karaoke setup is mostly about connecting them in the right order and setting levels so the mics sound loud and clear without squealing.
What You Need Before You Start: The Core Equipment List
Every karaoke system for home use, from a $150 box to a 1800-watt rack, is built from the same five blocks. Knowing which block you already own tells you what you still need to buy.
- Sound source: a phone, tablet, laptop, smart TV, or dedicated karaoke player that provides the backing track and lyrics.
- Speaker: powered (has its own amplifier) or passive (needs an external amp).
- Microphone: wired, UHF wireless, or Bluetooth.
- Mixer or mixing amplifier (optional): blends mic and music, adds echo and EQ, and controls feedback.
- Display: a TV, monitor, or tablet to show the lyrics.
The simplest path is an all-in-one machine like the K-12 portable Bluetooth karaoke machine with two wireless microphones, where the speaker, mics, and effects are already matched and wired for you. The flexible path is a component system, where you choose each piece and upgrade one part at a time as your room or crowd grows.
Step 1: Choose Your Sound Source (App, Smart TV, or Disc Player)
The sound source decides where your lyrics appear and how your audio has to travel. Pick it first, because everything downstream plugs into it.
Karaoke apps and streaming services on a phone or tablet are the most common choice now, with huge song libraries you can send out by Bluetooth or a 3.5mm-to-RCA cable. Smart TVs with YouTube or a karaoke app can also display lyrics and play backing tracks, but a TV has no microphone input, so you still need a speaker or mixer for your mics.
Dedicated karaoke players (disc players and hard-drive song machines) are still the best option for large curated libraries, scoring features, and Vietnamese song books. They connect to the TV by HDMI for video and to your mixer or amp by RCA for audio.
Step 2: Pick the Right Speaker for Your Room Size
Speaker size should match the room, not your ambition. A speaker that is too small gets pushed into distortion; one that is too large forces you to run it so quietly that it never sounds good.
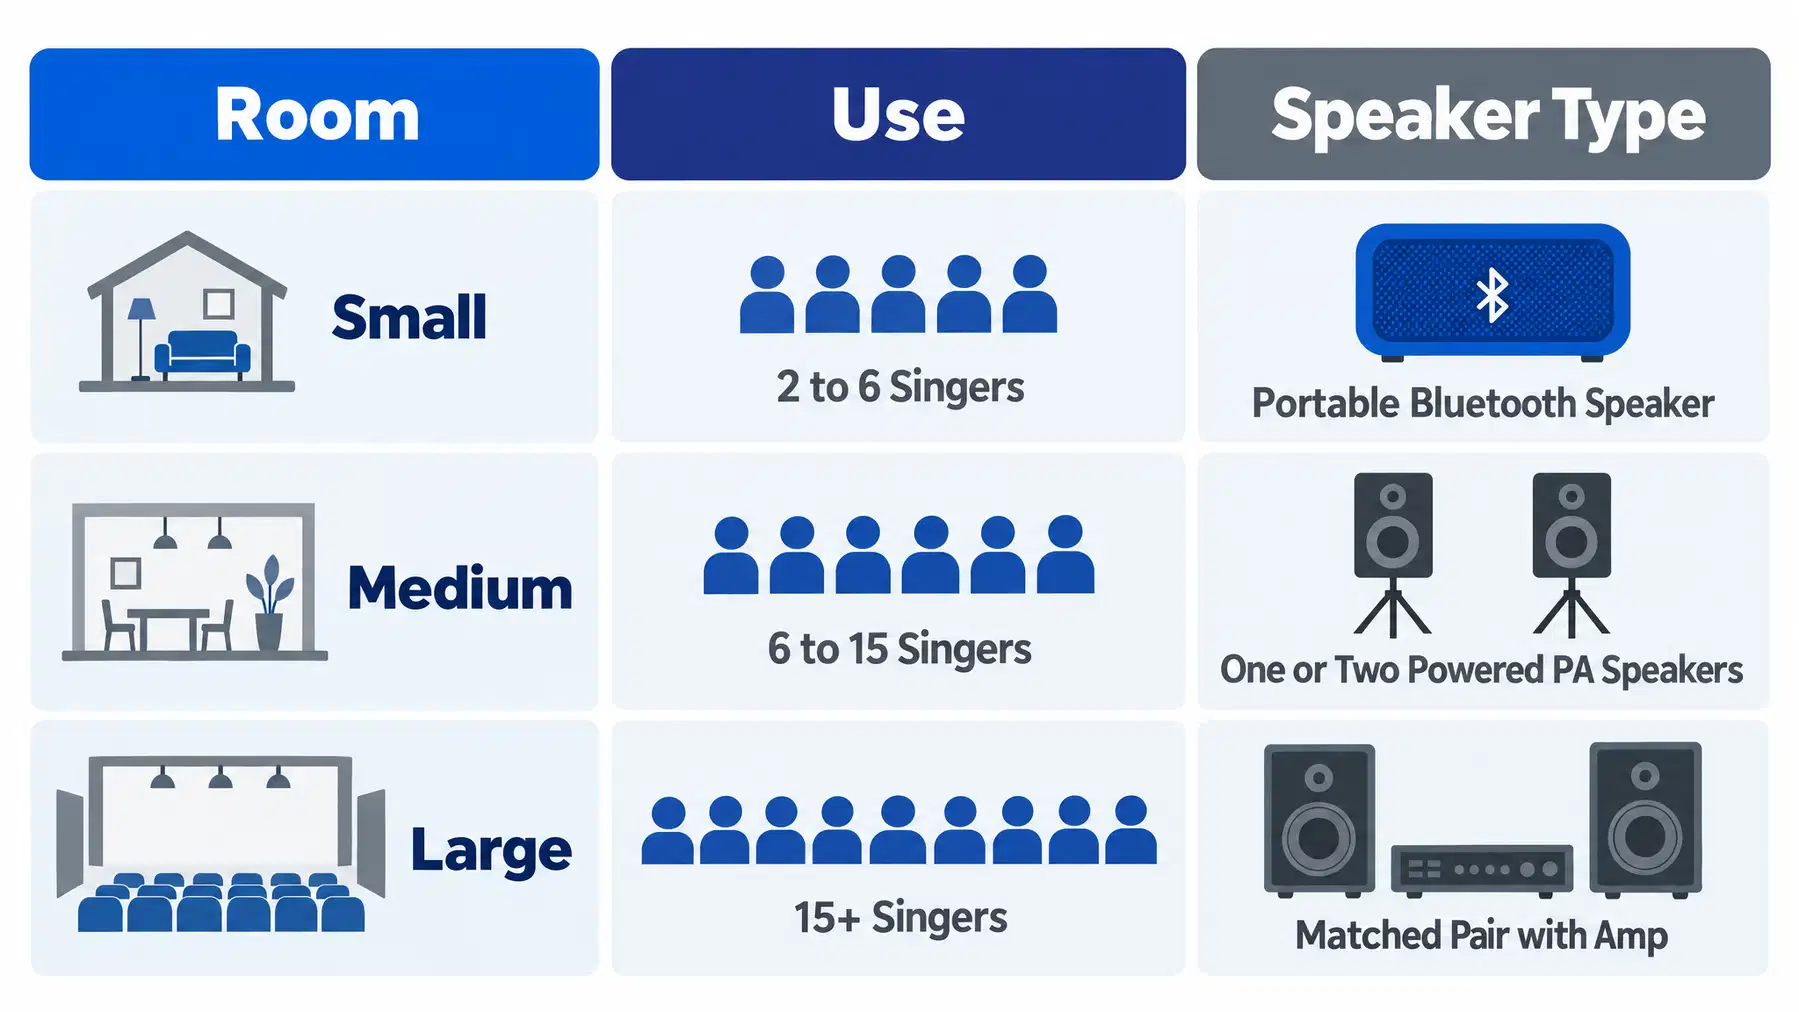
| Room | Typical use | Speaker type |
|---|---|---|
| Small (bedroom, apartment living room) | 2 to 6 singers | Portable Bluetooth karaoke speaker |
| Medium (open living room, garage) | 6 to 15 singers | One or two powered PA speakers |
| Large (basement, large den, patio) | 15+ singers | A matched pair of vocal speakers with an amp |
For a small room, a self-contained unit like the Divoom Songbird-Ultra 100W portable karaoke Bluetooth speaker covers it, since it includes two wireless mics, echo effects, and both Bluetooth and auxiliary input. For a medium room, a powered speaker such as the JBL IRX108BT 8-inch powered speaker with Bluetooth gives more headroom and a real mic input. For larger rooms, go to a pair of dedicated vocal speakers like the Better Music Builder CS-500 450-watt vocal speakers. Note that the CS-500 is a horizontal cabinet, not a vertical tower: it lays on its side on a shelf, stand top, or cabinet.
Step 3: Select a Microphone That Matches Your Setup
The microphone is the part guests actually touch, so it is the part they judge the system by. Three choices decide which one you need: wired versus wireless, single versus dual, and UHF versus Bluetooth.
Wired vs wireless. A wired dynamic mic on an XLR or quarter-inch cable is the most reliable and has effectively no delay. Wireless is better when people want to move around or pass the mic across a room. Single vs dual. Two mics are what turn a setup into a party, since duets and group choruses are most of what gets sung. Make sure your speaker or mixer has two mic inputs before buying a second mic.
UHF wireless vs Bluetooth. UHF wireless systems transmit on a dedicated radio band built for live vocals, so they hold up better over distance and feel lag-free in a way Bluetooth often does not. The ImPro UHF-88II professional UHF wireless microphone system also lets you adjust treble, bass, and echo from the microphone itself. Bluetooth mics still have a place: the K20 karaoke Bluetooth wireless microphone has a built-in speaker and effects, is rechargeable, and supports dual sing mode.
Step 4: Decide If You Need a Mixer or Amplifier
Do I need a mixer for home karaoke? Not always. If your speaker has a mic input with its own level and echo control, you can skip the mixer entirely and still get a good night out of it.
You need a mixer or mixing amplifier when you want more than a basic speaker can give. It adds independent control of music and mic levels, echo and reverb, EQ, multiple mic inputs, and feedback control, and becomes the central hub so your TV, player, mics, and speakers all land in one place.
For a compact system, the ImPro PMA-6888 900-watt karaoke mixing amplifier combines music playback, microphone mixing, and sound adjustment in one box and supports 8-ohm speakers. For a bigger room, the ImPro MA-8MKII 1800W 5-in-1 karaoke amplifier bundles a mixer, equalizer, feedback reducer, and two built-in wireless mics with a 200-foot range.
How to Set Up a Home Karaoke System: Step-by-Step Wiring Order
Order matters here. Connect everything with the power off, then bring the system up from the source end to the speaker end. This karaoke mixer setup sequence works with almost any brand.
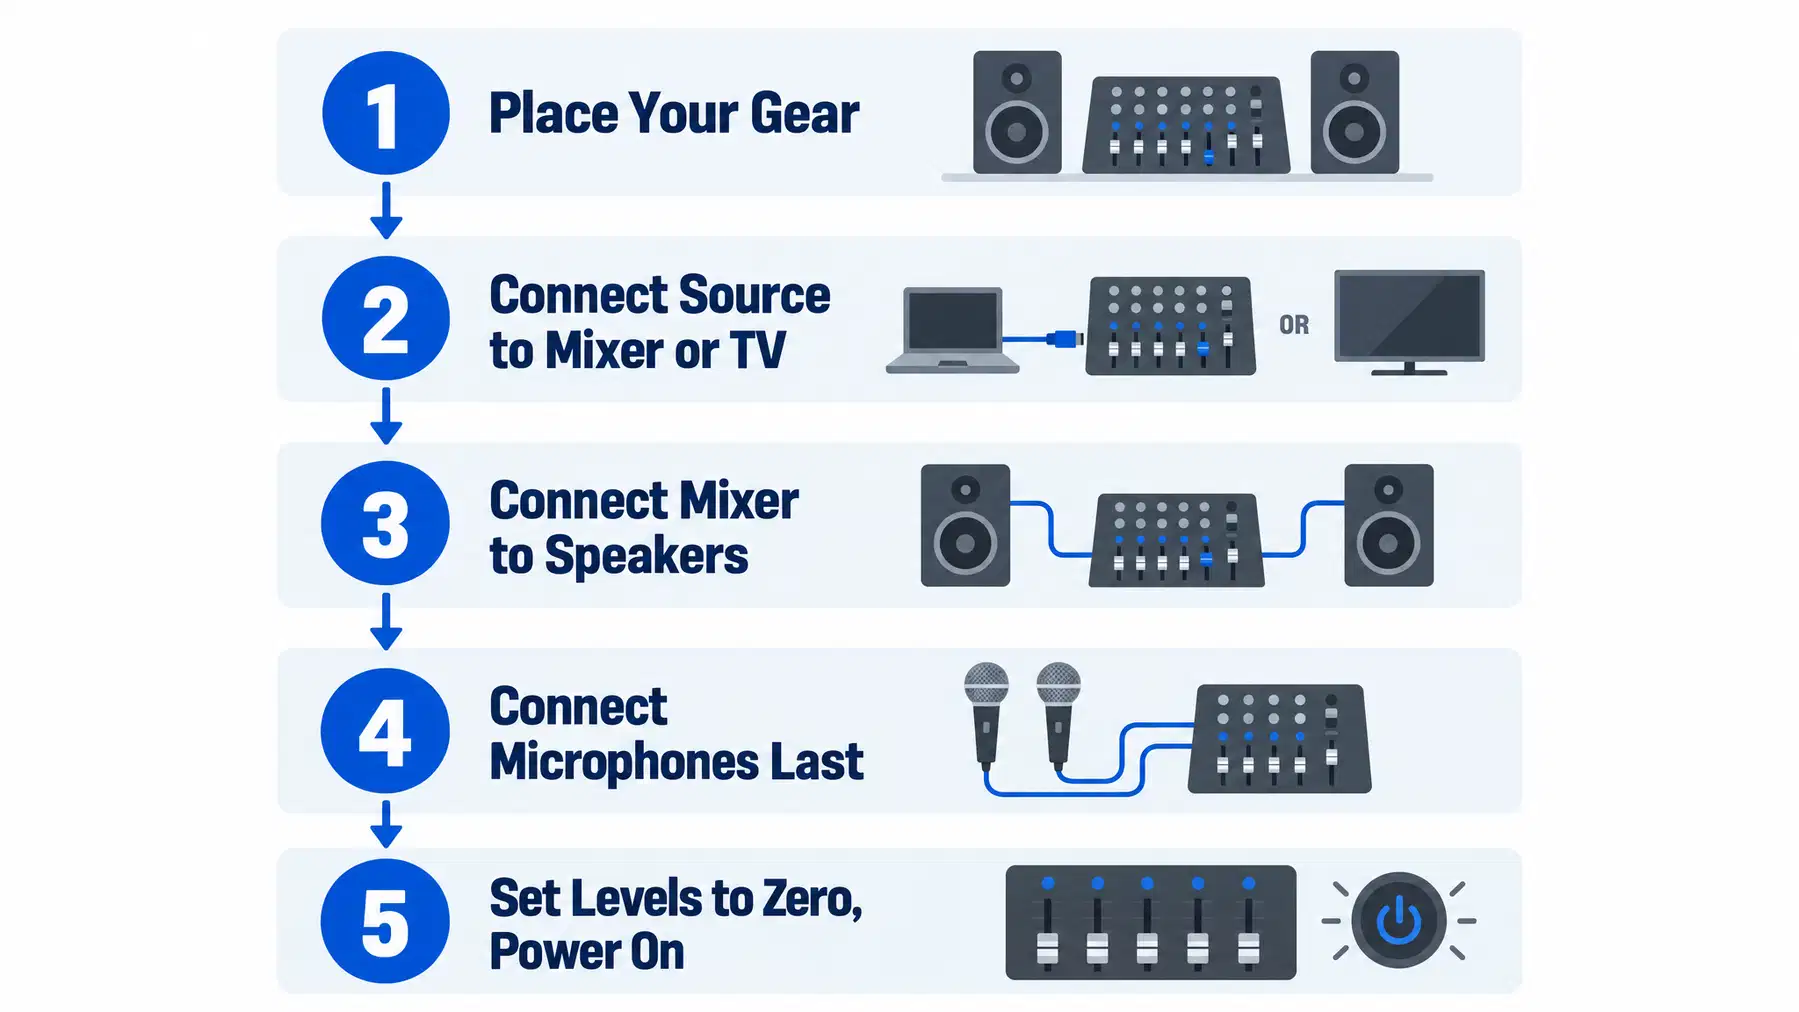
- Place your gear first. Put the TV where everyone can see it, the speakers facing the audience (never facing the mics), and the mixer within arm's reach.
- Connect the source to the mixer or TV. From a phone, run a 3.5mm-to-RCA cable or pair by Bluetooth. From a karaoke player, run HDMI to the TV and RCA to the mixer.
- Connect the mixer to the speakers. Powered speakers take a line-level cable from the mixer output; passive speakers take speaker wire from the amp's terminals. Match impedance, for example 8 ohms to 8-ohm speakers.
- Connect the microphones last. Plug wired mics into the mic inputs. For wireless, place the receiver with a clear line of sight. Pair Bluetooth mics only after the rest of the chain works.
- Set every level to zero or minimum, to prevent the loudest, most painful mistake in home karaoke.
- Power on from source to speakers, then power down in reverse order to avoid a thump through your speakers.
- Bring up levels slowly. Music first, then mic gain, then a touch of echo, as detailed in the next section.
Fixing Audio Lag and Feedback: The Setup Step Everyone Skips
This is the part the setup guides skip and the part that causes most returns. Two problems account for nearly all of it: delay and feedback.
Audio lag and lip-sync delay
When you sing along to a TV, you may hear your own voice arriving a beat behind your mouth. That happens because Bluetooth transmission and TV audio processing each add a small delay, and they stack. Research on audiovisual timing has found that people can detect and are affected by delays well under half a second between what they see and what they hear, which is exactly the range these systems land in (City St George's, University of London).
- Use a wired mic into a mixer, not a Bluetooth mic into the TV. A wired path through a mixer or mixing amplifier is the only reliably lag-free option.
- Route audio out of the TV instead of through it. Send the TV's optical or analog output into your mixer and mute the TV speakers.
- Turn off TV sound modes. Disable surround, night mode, and enhancement settings, and look for a game or low-latency mode.
Gain staging to stop feedback squeal
Feedback is a loop: the mic hears the speaker, the speaker gets louder, the loop screams. The cure is setting levels in the right order, not just turning things down.
- Set mic gain first, with echo off and master low, until normal singing reads healthy on the meter without clipping.
- Raise the master volume next, until the room is at the level you want.
- Add echo and reverb last, a little at a time. Echo re-feeds your voice into the system, so it is the fastest way to trigger squeal.
- Finally, trim EQ. If feedback still starts, pull down the frequency where it rings rather than turning everything down.
Connecting a Mic to a TV or Soundbar (When You Skip a Mixer)
This is the most common question we get, and the honest answer is that it depends on the ports you have. TVs do not accept microphones, so you need something between the mic and the sound.
- Soundbar with AUX or line-in: plug a mic preamp, a small karaoke mixer, or a mic-equipped speaker into the AUX input. A bare mic plugged straight into an AUX jack will be far too quiet.
- Karaoke machine with TV passthrough: plug the mic into the machine, run HDMI or RCA to the TV for lyrics, and let the machine handle the mixing.
- Bluetooth soundbar only, no inputs: this usually will not work well, since pairing a Bluetooth mic normally blocks the music source and adds delay.
DIY System vs. All-in-One Karaoke Machine: Which Should You Build?
There is no universally better answer, only a better fit. Use three questions to decide: how big is the room, how many people sing at once, and how often will you use it?
| If this is you | Choose | Why |
|---|---|---|
| Small room, occasional use, 1 to 4 singers | All-in-one machine | Nothing to wire, nothing to match, packs away in a closet |
| Medium to large room, regular parties, 2+ mics | Component system | More volume, better vocal clarity, real echo and EQ control |
| Growing setup, want to upgrade over time | Component system | Swap one piece at a time instead of replacing everything |
| Want portability above all | All-in-one machine | Battery power and one-hand carry |
On the all-in-one side, a portable machine with built-in wireless mics and effects covers a casual home karaoke setup completely. On the component side, a bundle such as the ImPro Champion Package with mixing amplifier, speakers, microphones, and accessories pairs an 1800W amplifier with 12-inch speakers, dual wireless mics, a feedback reducer, and vocal-focused tuning, so the matching work is already done for you.
If you want a middle ground, an all-in-one column PA like the JBL IRX ONE with built-in 3-channel mixer and Bluetooth streaming gives you mixer control and real PA volume in a single carry.
Testing and Fine-Tuning Your System Before Your First Party
- Mic level check. Sing a full-volume chorus. Pass: the meter peaks without clipping and the vocal sits above the music.
- Hum and buzz check. Turn the music off and the mic up. Pass: near-silence.
- Song sync check. Play a familiar track and watch the lyrics. Pass: words highlight in time with the audio.
- Two-mic check. Have someone sing with you on both mics at full volume. Pass: no feedback and balanced voices.
- Walk the room. Sing while walking to the far corners. Pass: no dropouts and no squeal near the speakers.
If you are still stuck after that, tell us the room size, the gear you have, and what you hear. Our team at Mega Karaoke DJ Center works through these setups daily and can tell you whether you need a different cable or a different box.
Frequently asked questions
What equipment do I need for a basic home karaoke setup?
At minimum you need a sound source, a speaker, a microphone, and a screen. A mixer is optional and only needed for two or more mics, echo control, or a larger room.
Can I use my smart TV for karaoke?
Yes, any smart TV with YouTube or a karaoke app can display lyrics and play tracks. You still need a speaker or mixer for the mics, since TVs lack a mic input.
How do I connect a microphone to my TV or soundbar?
You cannot plug a mic directly into a TV, so it goes into a karaoke machine, mixer, or powered speaker with a mic input, which then feeds the TV.
Is it better to buy a karaoke machine or a DIY system?
A karaoke machine wins for small rooms, occasional use, and portability. A component system wins for bigger rooms, frequent parties, and gradual upgrades.
What are the best free karaoke apps or websites for home use?
YouTube is the most widely used free option, with large libraries of backing tracks and lyrics in many languages.
Do I need a mixer for home karaoke?
No, not if your speaker already has a mic input with its own level and echo control. You need one once you want multiple mic inputs, independent levels, EQ, or feedback control.
How do I prevent audio lag (latency) when singing through a TV?
Use a wired mic into a mixer rather than Bluetooth into the TV, and send the TV's audio out to your system instead of listening through the TV speakers.
Can I use my existing home theater speakers for karaoke?
Sometimes, but it is rarely ideal, since home theater speakers add processing delay and often lack a mic input.